
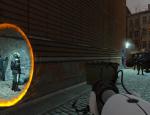
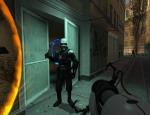
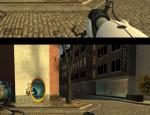
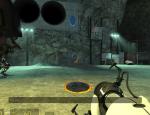
Primotech qui a adoré Portal s'est demandé comment introduire l'arme du jeu dans Half-Life 2, Half-Life 2 : Episode 1 ou tout autre jeu utilisant le Source Engine. Le résultat est assez saisissant. Le gameplay s'en trouve totalement chamboulé, ces jeux n'étant pas fait pour ça, mais l'exploit mérite d'être souligné.
Les différentes étapes pour intégrer l'arme de Portal dans Half-Life 2 se trouvent en anglais dans la suite de la nouvelle.


Les différentes étapes pour intégrer l'arme de Portal dans Half-Life 2 se trouvent en anglais dans la suite de la nouvelle.
- First off, backup up your entire Portal directory in a safe place. It's the folder marked "portal" in ..\Steam\steamapps\(your_username)\. We, nor Valve, take any responsibility in the unlikely event of you hosing your game files. Worse comes to worse though, you could always just redownload.
- Next, download and install, if you haven't already, GCFScape. This handy program will allow you to access the cached game files for any Source-powered game, in addition to several other Steam games you may have downloaded.
- Once that's done, browse to the directory ..\Steam\steamapps\. There, you'll see all the available GCF archives. We'll start with Half-Life 2.
- Open the GCF marked "half-life 2 content.gcf" You'll see a directory tree in the left pane. Click the box to the left of the folder marked "hl2" to see the directory listing contained within it. Then, right-click "maps" select "Extract" and extract the entire folder into the directory \Steam\steamapps\the_great_bundini\portal\portal. This will merge it with the existing Portal map folder.
- Do the same with the "scenes" folder
- Fire up Steam and run Portal. When it's done doing its thing, open up the developer console with "~" (you may need to enable it under your keyboard options).
- At the console, type "maps *" to list all the available maps. Now that you've imported the Half-Life 2 maps, this will be a fairly lengthy list and some of the names, like citadel and canals, should seem familiar.
- Type "map" and then the map name to open that map. For instance, "map d1_canals_01"
- When the map is done loading, pull up the console again and enable cheats by entering "sv_cheats 1"
- To give yourself all weapons, including the portal gun, enter "impulse 101"
- Depending on how far you got in Portal, you may need to upgrade the portal gun to fire both portals. Enter "upgrade_portalgun" to do so
- Go lay waste to some alien scum with the power of portals!


